In this article
- Supplies for an upside-down wine glass Christmas centerpiece
- Step 1: Clean the glasses and dry-fit them on the wood
- Step 2: Arrange three small ornament clusters
- Step 3: Lower the inverted glasses over the scenes
- Step 4: Tie the lace, jute bows, and wooden snowflakes
- Step 5: Set the battery LED tealights on the upturned feet
- Step 6: Finish the wood slice with low greenery and baubles
- Common questions, troubleshooting, and storage
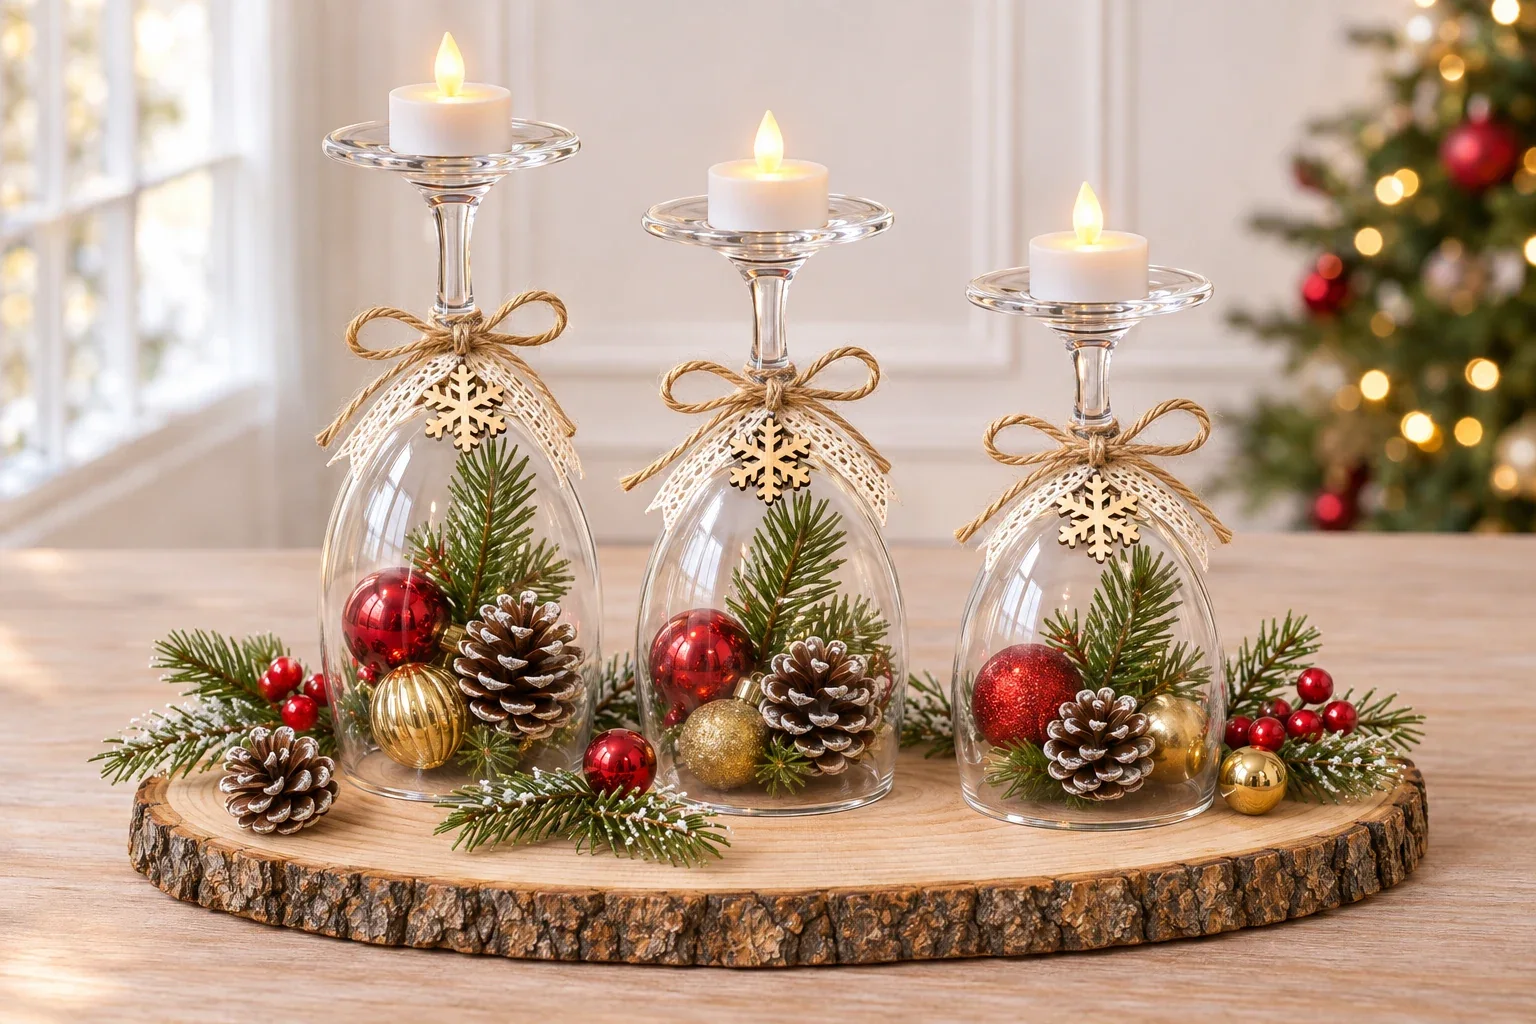
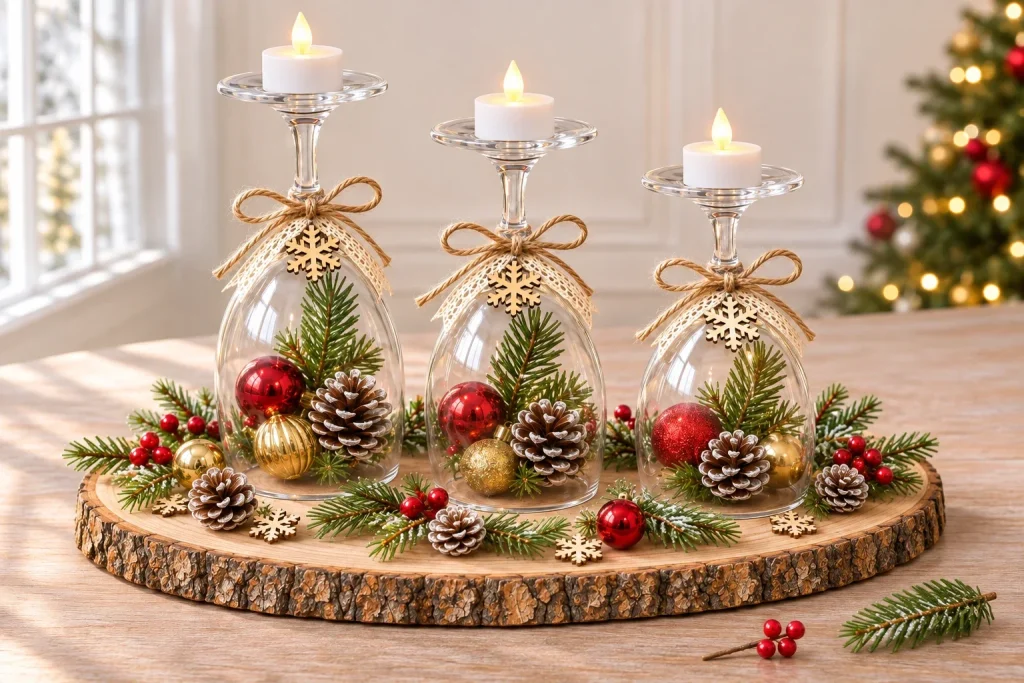
Turn three ordinary-looking wine glasses into a Christmas centerpiece with tiny ornaments beneath the bowls and a warm LED glow above them. In this upside-down wine glass centerpiece, the glasses become clear display domes, while their upturned feet hold small battery lights.
The look comes from a few repeated details: red and gold baubles, snowy pinecones, cream lace, natural twine, and little wooden snowflakes. An oval wood slice brings everything together without hiding the glass or the miniature scenes inside it.
This guide breaks the arrangement into six stages, from choosing a flat base to adding the final greenery. Assemble it where you intend to display it, keep the glasses removable, and use lightweight battery LED tealights rather than burning candles.
Supplies for an upside-down wine glass Christmas centerpiece
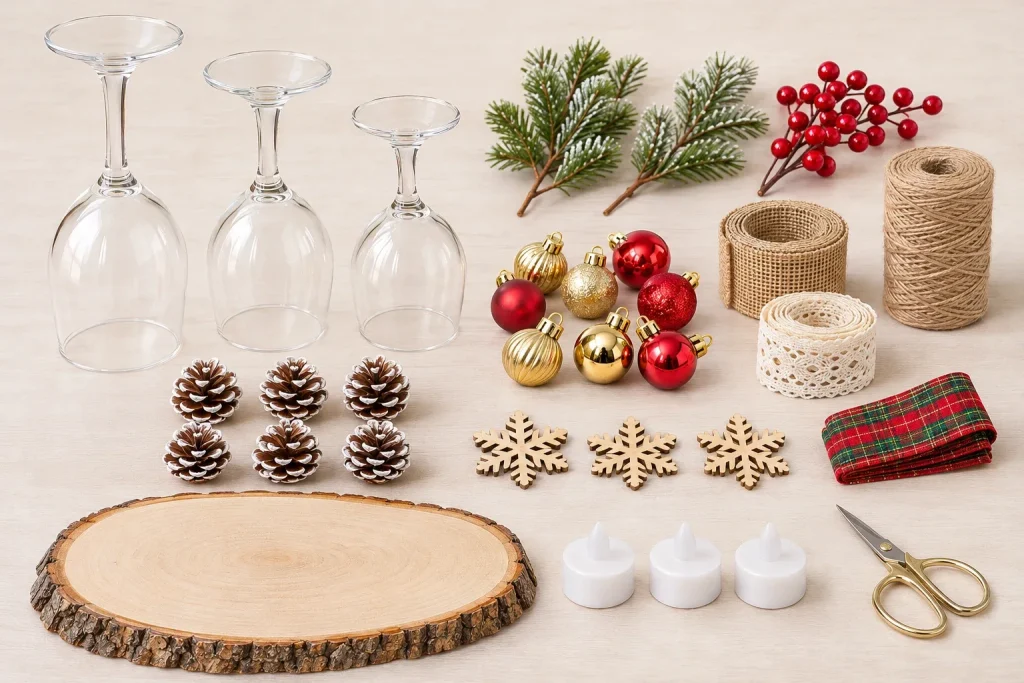
- Three clear stemmed wine glasses: intact, with smooth drinking rims and feet that can support your chosen lightweight LED lights without rocking. Matching glasses work, or use compatible graduated heights.
- One oval wood slice: wide and long enough for all three inverted glass rims to sit fully on a flat surface, away from the bark edge.
- Miniature shatterproof ornaments: a small selection of red and gold baubles that fit comfortably inside the glass bowls.
- Small pinecones: choose clean miniature cones, with prefinished white tips if you like the snowy effect.
- Faux evergreen and red berries: short pieces for inside the glasses and a few more for the board.
- Natural jute twine: for the bows and hanging ornament loops.
- Cream lace ribbon: for soft tails beneath the twine bows.
- Wooden snowflake ornaments: one small lightweight ornament per glass, preferably with a ready-made hanging hole.
- Three battery LED tealights: small, light, and suitable for the intended placement, with intact, securely closed battery compartments.
- Optional ribbon: a narrow burlap or red-and-green tartan accent.
- Basic tools: scissors, a soft cleaning cloth, and a ruler or measuring tape.
No permanent glass bonding is needed for this removable display. Avoid treating a glued joint as a way to make an unsuitable or unstable glass work. If the shape will not sit securely, choose another glass or leave that part of the arrangement out.
A little coordination is enough: use the same twine and lace on all three glasses, then repeat the red-and-gold palette inside and around them. Optional tartan or burlap should support that look rather than cover every clear surface.
Step 1: Clean the glasses and dry-fit them on the wood
Inspect each piece before decorating
Check the drinking rim, bowl, stem, and foot of every glass for chips, cracks, or damage. Choose sound pieces and handle them gently. Clean them according to their maker’s care instructions, then dry them so fingerprints and water spots do not distract from the finished display.
Wipe the wood slice and remove loose debris. Its upper surface must be flat enough for the glass rims, and its underside should sit securely on the table. A pretty bark edge does not compensate for a board that wobbles.
Find the final position now
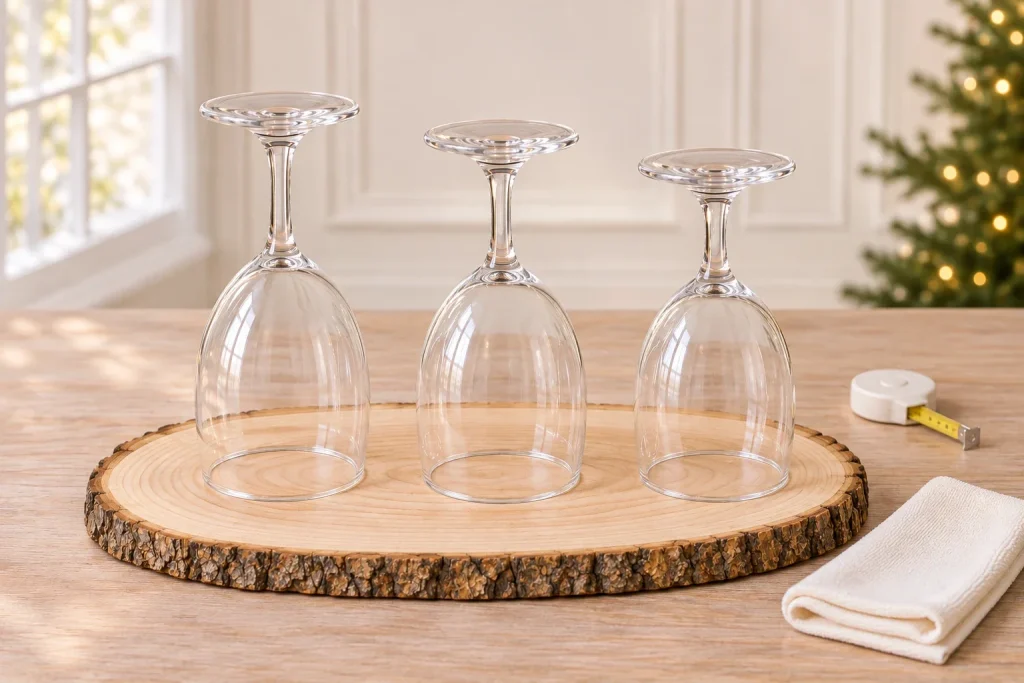
Put the empty wood slice at its display location. Turn the empty glasses upside down and space them along it. Their drinking rims should contact the flat wood all the way around, without hanging over the edge or sitting on bark, cracks, or loose trim.
Leave a visible gap between neighboring bowls. If you use different heights, try the tallest at one end or slightly behind the others, then check the arrangement from the main viewing angle. Avoid making people reach across it on a busy serving table.
Check the upturned feet too: the lights you intend to use must sit upright and fully supported on them. If a foot is too curved, too narrow, or causes the light to tilt, change the glass or omit the light. Do this fitting while the glasses are empty, then remove them before arranging the fillers.
Step 2: Arrange three small ornament clusters
Build the miniature scenes on the board first. This is easier than filling a glass and trying to flip it over without spilling everything.
For each cluster, start with two small red-and-gold ornaments, one miniature pinecone, and a short faux evergreen sprig. This is a starting layout, not a requirement to squeeze that many objects into every bowl. Reduce the number if your glasses are smaller.
- Set the pinecone toward the front: its pale tips give the scene texture and a clear focal point.
- Add the baubles beside it: combine a shiny finish with a matte or glittered one if you want subtle variety.
- Place a short sprig behind: keep it low enough to clear the inside of the glass.
- Repeat the colors: make the clusters related without forcing them to be identical.
Keep every cluster smaller than its intended rim footprint. Allow clearance above it and around the sides; nothing should need to be compressed against the glass. Decorative wire ends and ornament caps should point away from the glass walls.
Use short, compact sprigs rather than long branches that must bend under the rim. If a bauble keeps rolling, adjust its position against another small decoration within the cluster, not against the glass itself.
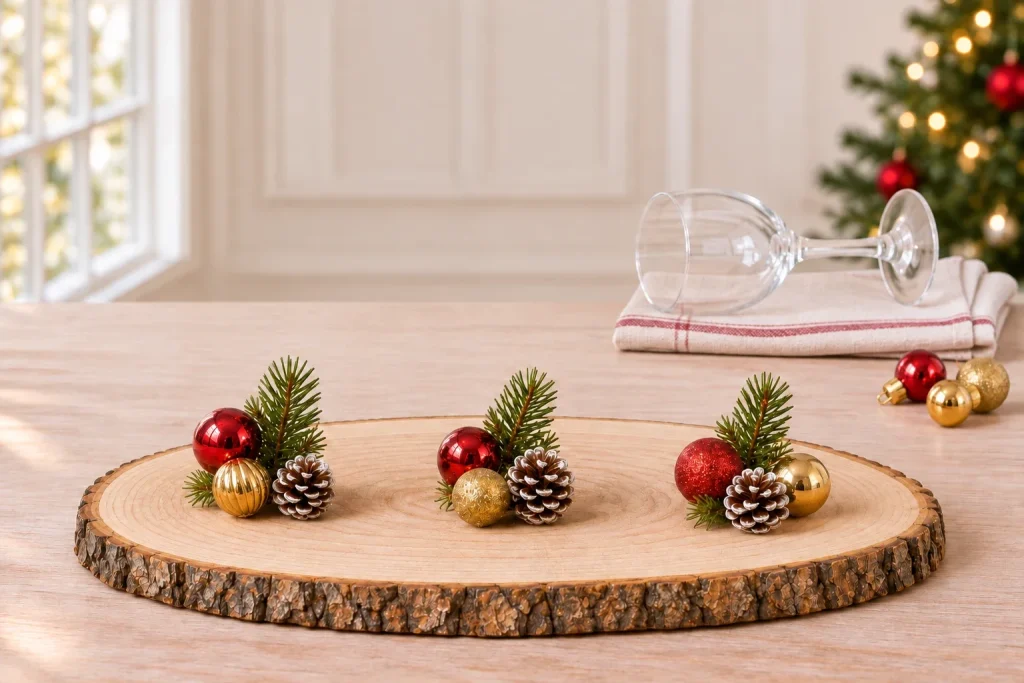
Step 3: Lower the inverted glasses over the scenes
Work with one cluster at a time. Hold the glass securely around its bowl, turn it rim-down, and lower it vertically over the arranged decorations. Avoid using the thin stem as a handle for pressing or repositioning.
Watch the rim as it approaches the board. A pine needle, ornament cap, or twig caught beneath it can leave the glass tilted. Lift the glass completely away, correct the obstruction, and lower it again rather than twisting it over the decorations.
The bowl should enclose the scene with comfortable space around the fillers. It must not rest on a pinecone or be held up by an ornament. Remove a piece if it is too tall; do not push the glass down to make the arrangement fit.
Once all three glasses are in position, look from the side to check that the rims are resting evenly. The effect should resemble three small clear domes, with their stems pointing up and their round feet at the top. Keep the surrounding board mostly bare until the glasses are settled.
This is a removable tabletop arrangement. Do not lift the board and carry it around with loose glasses standing on it. Move the components separately and rebuild the display at its final location.
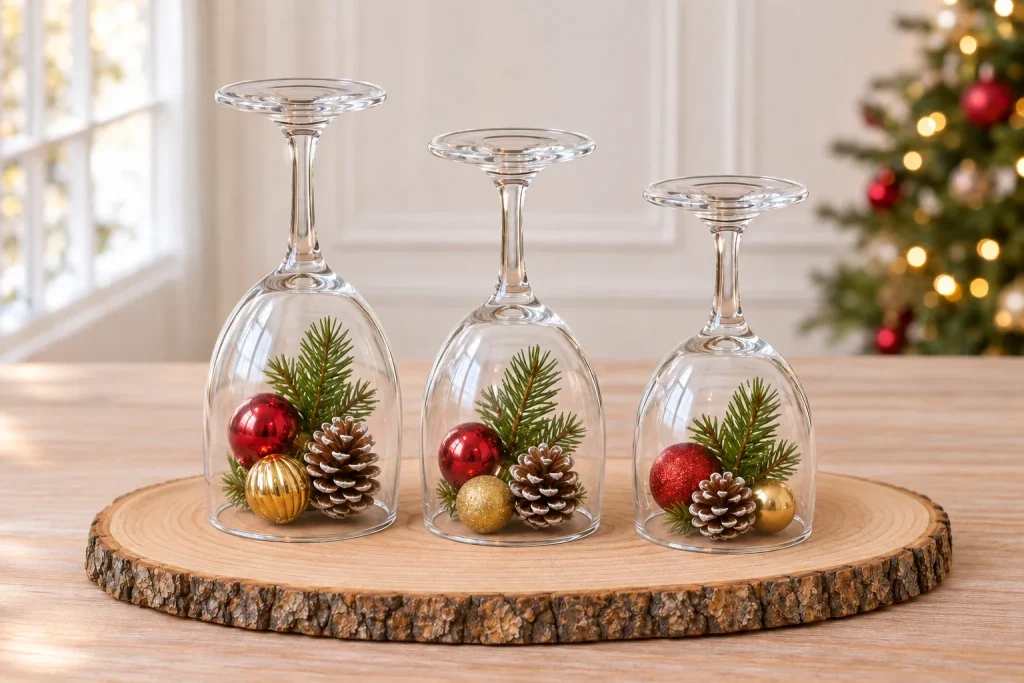
Step 4: Tie the lace, jute bows, and wooden snowflakes
Make one trim sample before cutting three sets
Choose a short length of lace that makes two soft tails near the bowl-to-stem junction. Hold it in place loosely and check where the ends fall. They should decorate the upper part of the bowl without hiding the ornaments or reaching the rim beneath it.
Use a piece of twine to try a bow around the same area. Form the loops before trimming the ends, then use that first successful length as a guide for the other two bows. This avoids guessing a cut length that may not suit your glass shape.
Secure the ornament without stressing the stem
If a glass shifts while you work, remove it and tie the trim while it is supported safely in your hands or on a folded cloth. Reposition it over the cluster afterward. Do not tug against the assembled display to tighten a knot.
Place the lace beneath the twine, tie a gentle bow, and adjust the loops. Thread a separate short twine loop through the wooden snowflake’s hanging hole and secure it at the bow so the snowflake hangs at the front. Keep it lightweight and clear of anything that might pull on the stem.
Repeat the position and overall size on the other glasses. A small tartan or burlap accent can replace part of the lace if you prefer, but keep the stem visible and avoid a bulky knot. No trim should extend up onto the foot where the LED will sit.
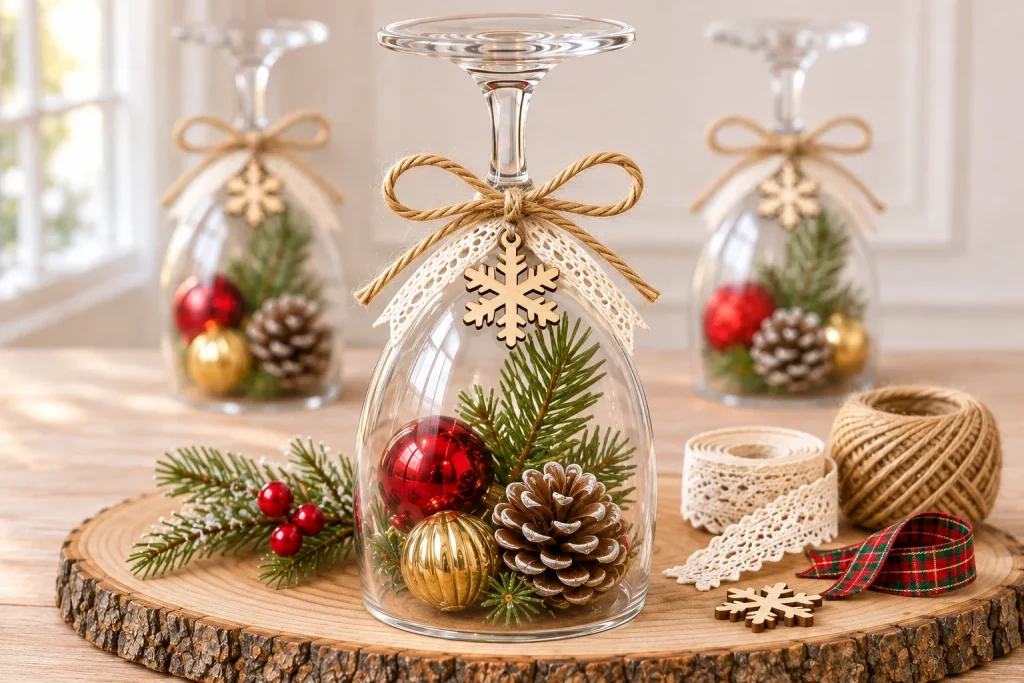
Step 5: Set the battery LED tealights on the upturned feet
Test each LED before placing it. Check that its housing and battery cover are undamaged, the compartment closes securely, and the unit works according to its instructions. The CPSC’s button-battery guidance emphasizes keeping accessible batteries away from children and checking battery-compartment closures.
Place each lightweight light in the center of an upturned foot. The entire light base should be supported, without overhanging, tilting, or resting on a bow or ribbon. Do not stack decorations beneath it or add weight to compensate for an unsuitable glass.
If you cannot achieve a secure fit, leave the display unlit or choose an appropriate purpose-made display holder instead. A normal wine glass is not automatically designed to carry an extra object in this orientation.
Use battery LEDs only for this arrangement. Do not replace them with real tealights, votives, or other burning candles. Twine, ribbon, faux greenery, and a wood base make this a decorative craft display, not an open-flame candle setup. The U.S. Fire Administration recommends considering flameless battery candles as an alternative to lit candles.
Switch the LEDs off when they are not in use and follow their care and battery directions. Keep the finished arrangement away from children, pets, and places where someone could brush against the stems.
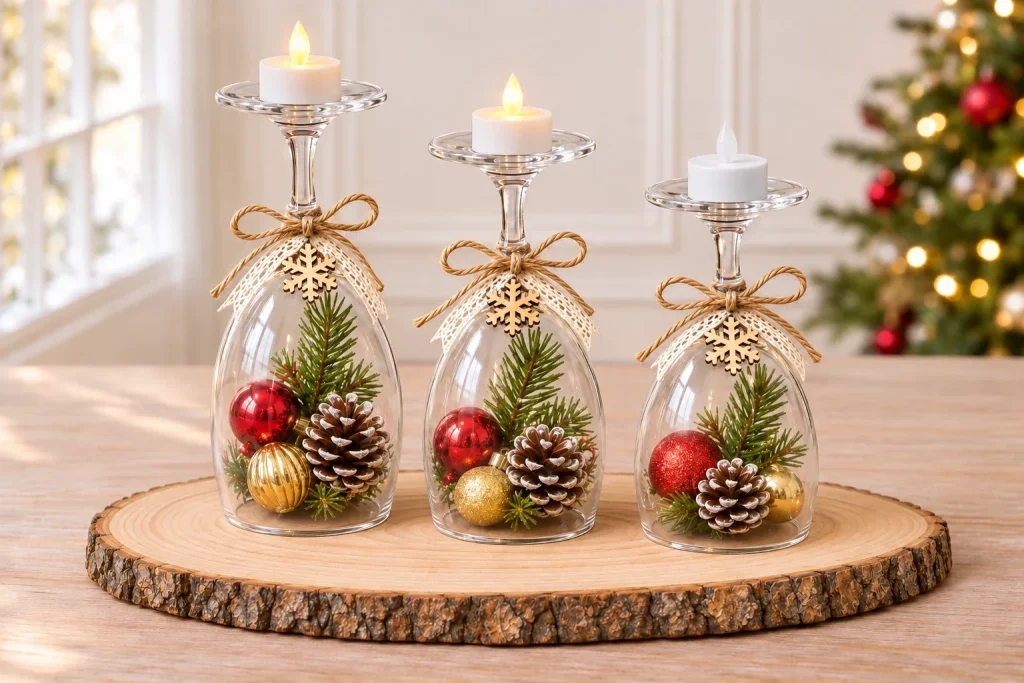
Step 6: Finish the wood slice with low greenery and baubles
With the glasses settled, arrange short faux evergreen pieces around their outside edges. Keep the bark visible and let the wood remain part of the design. A low, broken border looks lighter than packing every gap with foliage.
Add a few red berry accents, miniature frosted pinecones, and small red-and-gold baubles. Repeat the colors inside the glasses so the base and domes feel connected. One or two spare wooden snowflakes can lie on the board as a quiet finishing detail.
Keep every glass rim unobstructed. If a branch slides under one, lift the glass and correct the layout rather than pulling against the bowl. Decorations should never act as wedges, props, or supports.
Look at the centerpiece from the front and both sides. Remove anything that blocks a snowflake charm, hides a whole glass bowl, or pushes the arrangement too close to the edge. Stop when you can still see the three individual scenes clearly.
Common questions, troubleshooting, and storage
Can I use glasses that are all the same height?
Yes. Matching glasses create a calm, repeated rhythm. You can vary the fillers slightly while keeping the same lace, twine, and ornament style. Different heights are an aesthetic option, not a reason to use a glass that fails the fitting checks.
Why does one glass rock on the board?
Check for an uneven wood surface, a damaged rim, or a trapped decoration. Do not hide the problem beneath greenery. Use a different flat base or a suitable undamaged glass if necessary.
What if the ornaments do not fit?
Choose smaller fillers or use fewer pieces. The glass should lower freely over the scene without pressure on its walls. The photos illustrate a layout; your actual bowl dimensions determine what will fit.
Should I glue the glasses to the board?
This guide uses removable components and does not rely on structural glue. Do not assume a craft adhesive makes a fragile or unstable arrangement secure. For a permanently assembled piece that needs transporting, use a purpose-made display system designed for that use.
How do I pack it away?
Remove the LEDs first, then take off the loose base decorations. Lift each glass separately and clear the fillers from the board. Untie the trim before cleaning the glasses according to their maker’s instructions. Store fragile pieces cushioned individually, and follow the light manufacturer’s guidance for batteries during storage.
The appeal of this centerpiece is its balance: clear glass, a few bright ornaments, soft textile details, and warm light. Keep the arrangement small enough for its setting and choose a simpler layout whenever an extra embellishment makes it harder to assemble securely.
Images are AI-generated illustrations. Check the actual glass shapes, board, trim, and lights before assembling the display; this arrangement has not been physically tested by the author.