In this article
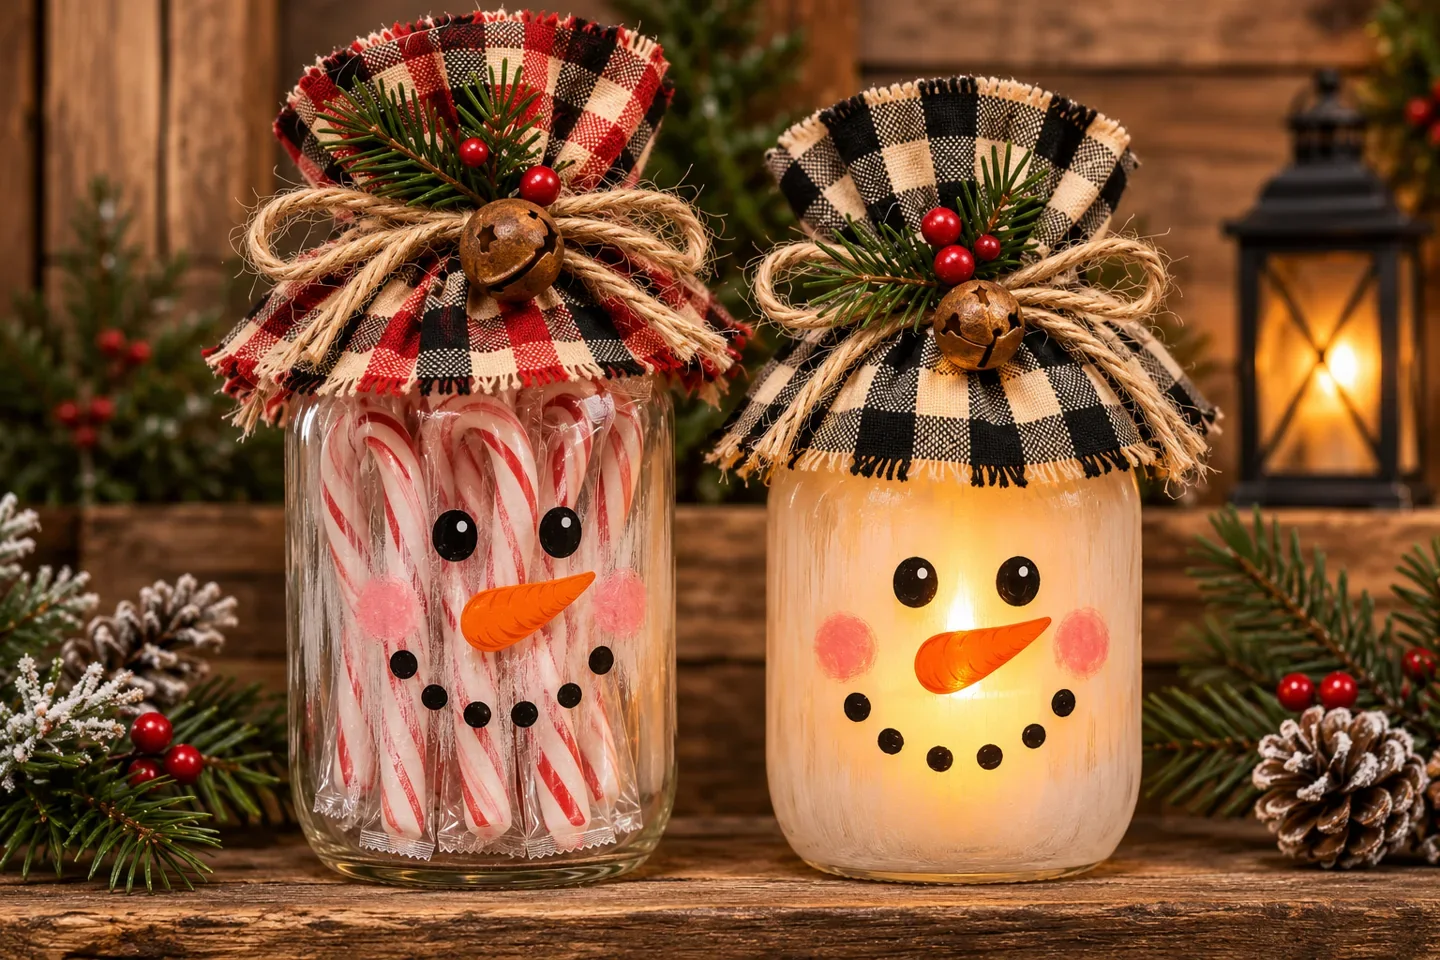
A DIY mason jar snowman starts with a painted glass jar and gets its character from a simple face, a gathered plaid hat and a loose twine bow. Make one as a holder for individually wrapped candy canes, or use a battery-operated LED light to turn it into a glowing Christmas decoration.
This tutorial walks through the project from cleaning the jar to fitting the removable hat. The main difference between the two versions is the white paint: a light, slightly translucent finish suits the illuminated jar, while a more opaque finish works for the candy holder.
The supplied images are AI-generated illustrations of the design, rather than photographs of a tested build. Use your jar and lid band to check fabric measurements and fit as you work.
Supplies for a mason jar snowman
Start with one jar. If you want the pair shown in the illustrations, repeat the process with a second jar and a different plaid fabric.
- One clean, undamaged glass mason jar with a matching two-piece lid.
- The metal screw band from the lid; set the flat disc aside.
- White, black, orange and pink acrylic craft paint suitable for glass.
- A flat brush for the base coat and a small detail brush for the face.
- A scrap of lightweight plaid cotton or similar fabric.
- Jute twine, scissors and a flexible measuring tape.
- A hot glue gun, compatible glue sticks and a heat-resistant work mat.
- Optional small bell and faux greenery or berry pick.
- For the candy version: individually wrapped candy canes that fit your jar.
- For the light version: a self-contained battery-operated LED tealight that fits through the opening.
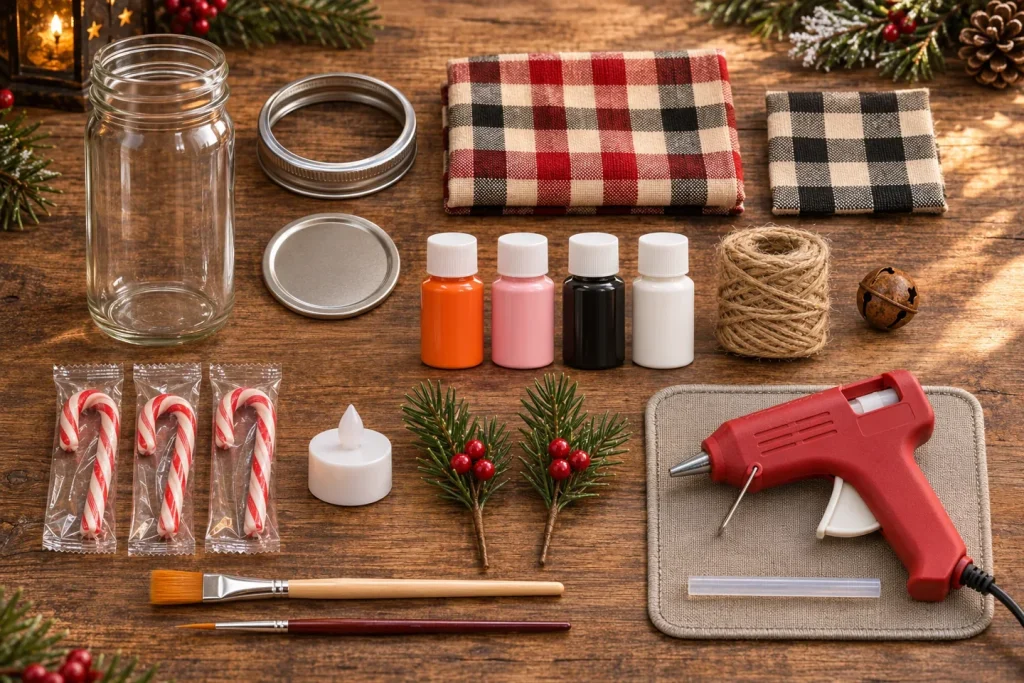
Gather the supplies before painting. The flat lid disc is not used in the fabric hat.
Planning note: Allow roughly an hour for the hands-on work, plus the paint manufacturer’s drying and curing time. This is a planning estimate, not a measured project time. Let each paint layer dry properly rather than trying to finish everything in one sitting.
Cover the table and keep the jar on a stable surface. An adult should handle hot glue and sharp scissors. Keep small bells, loose decorations and LED batteries away from young children.
How to make a mason jar snowman, step by step
Step 1: Clean the jar and check the lid
Remove any label and wash away adhesive residue. Rinse and dry the jar completely, including the neck and threads. Grease or damp patches can make paint separate or lift.
Check for chips around the rim, then test the screw band before decorating it. It should turn freely and sit level. Remove the flat lid disc and put it aside; the hat will be attached to the open metal band.
Keep the inside of the jar, the lip and the screw threads free of paint and glue. Leave enough clear space at the neck for the band to turn without scraping the painted body.
Step 2: Paint the outside white
Use a flat brush to apply a thin coat of white acrylic paint to the outside of the jar. Work around the body with light strokes, and avoid repeatedly brushing an area once it starts to become tacky.
For the candy holder, add another thin coat after the first has dried if you want stronger white coverage. For the LED version, stop while the glass still allows light through. Test the effect with the LED once the paint is dry; a heavy opaque layer can hide most of the glow.
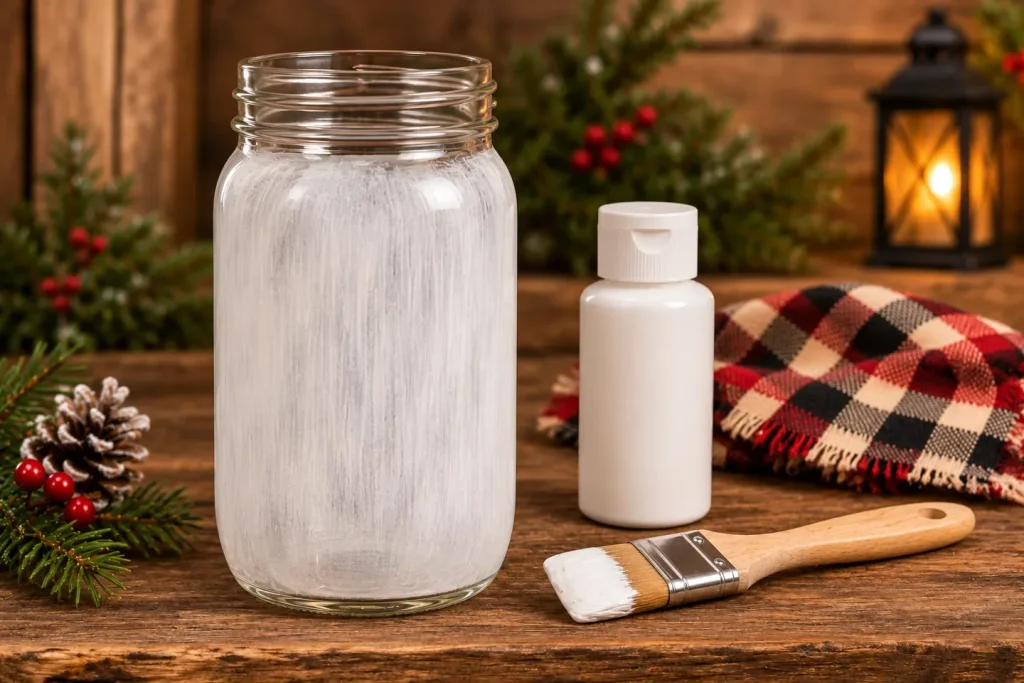
Build the white finish in thin layers, keeping the rim and threads clear.
Follow the instructions on your paint for drying and curing. Dry to the touch does not always mean ready for handling or cleaning. If ordinary acrylic beads up on the glass, use a glass-compatible paint or the preparation method recommended by its manufacturer.
Step 3: Paint the eyes, carrot nose and smile
Choose the smoothest side of the jar for the face. Picture the finished hat sitting above it, leaving space between the eyes and the bottom of the fabric brim.
- Paint two small black eyes near the upper middle of the white area.
- Add an orange carrot-shaped nose underneath, pointing slightly to one side.
- Place two soft pink circles beside the nose for cheeks.
- Paint a curved row of small black dots below the nose for the smile.
- If you like, add a tiny white highlight to each eye after the black paint dries.
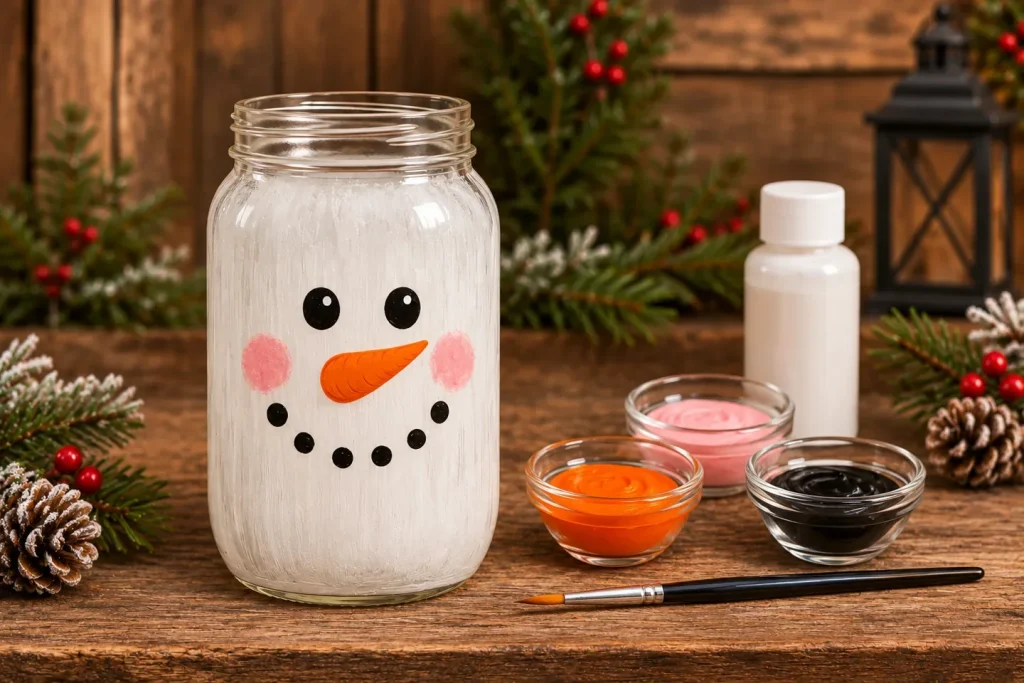
Keep the features compact enough to fit below the plaid hat.
For round dots, use the end of a brush handle dipped lightly in paint. Try a few dots on scrap paper first. If you make a mistake, let it dry, touch up with white, and repaint the detail. Rubbing wet black paint into the white base tends to leave a gray patch.
Step 4: Measure and cut the plaid fabric
Measure around the outside of the metal screw band. Cut a rectangular strip slightly longer than that circumference so the ends can overlap. Make it tall enough to form a short lower brim, rise above the opening and gather into a tied top.
Use a paper strip to test the shape before cutting your favorite fabric. Wrap it around the band, pinch the top together and check the proportions against the jar. A tall jar can take a taller hat; a small jar usually looks better with less fabric.
For the rustic finish shown, lightly fray the cut edge by pulling away a few loose threads. Trim long strands so they do not hang across the face or catch in the screw threads.
Step 5: Attach the fabric to the metal band
Place the band on the heat-resistant mat. Position the fabric around its outside wall, allowing a little fabric to hang below as a brim and the taller part to extend above the opening.
Run a short bead of hot glue along the outside of the band and press the fabric into place without touching the hot glue. Continue in small sections, making shallow pleats as needed. Overlap and glue the ends at the back.
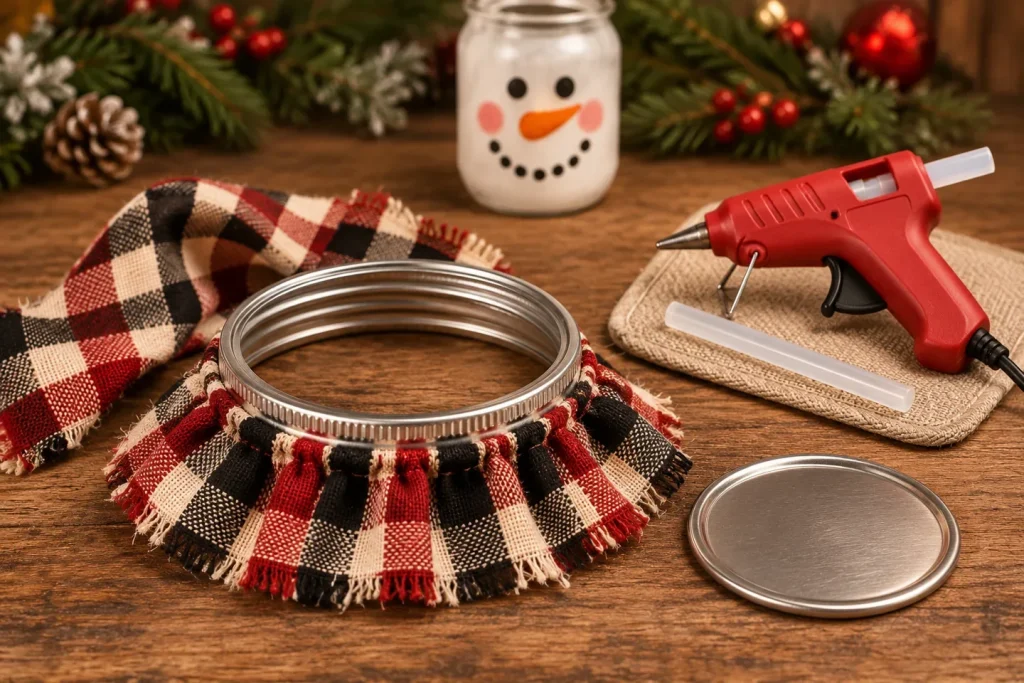
Attach fabric outside the band and keep glue away from its internal threads.
Do not wrap fabric underneath the band or fill the threads with glue: either can stop it fitting the jar. Once the glue has cooled, test the fit gently. If it catches, remove the hat and inspect the obstruction instead of forcing it.
Step 6: Gather the hat and tie the bow
Pinch the fabric together above the band to create a soft crown. Tie twine around the gathered section, secure it with a knot and finish with a bow. Spread the fabric above the tie into a small fan and arrange the lower brim.
Add a small bell at the front if desired. Tuck a short faux greenery pick behind the bow and secure it with a small amount of glue. Trim or cover any exposed wire end, and keep the decoration light enough that the hat stays upright.
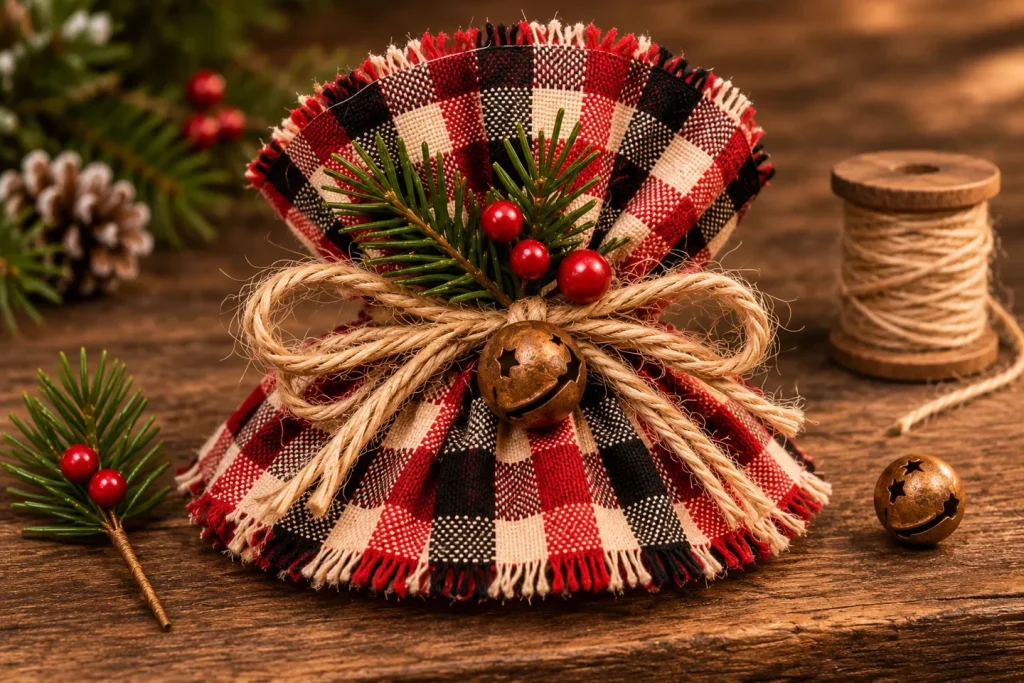
A loose twine bow, bell and greenery complete the rustic hat.
Test the hat on the jar again. Leave it removable so you can refill the jar or reach the LED switch. Hold the jar by its glass body when moving it, rather than lifting it by the fabric or bow.
Option 1: Make a snowman candy cane jar
Let the paint cure fully before adding candy. Remove the hat and place individually wrapped candy canes inside. Choose short candy canes if taller ones prevent the hat sitting naturally; do not force the fabric down over them.
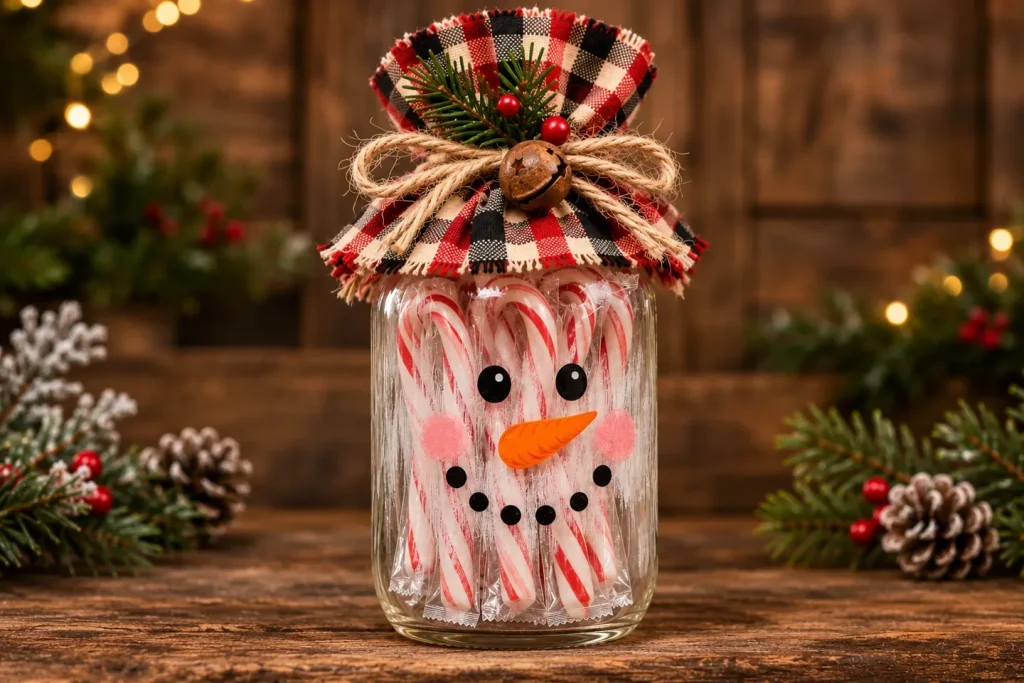
The candy version uses wrapped treats and a removable fabric hat.
Keep wrappers intact and prevent candy from touching painted or glued surfaces. This is a decorative holder, not an airtight food-storage container. If you need space for tall candy canes, you can display the hat beside the jar instead of closing the top.
For a small Christmas gift, add a paper tag to the twine. Keep the wording short so the snowman face stays the focus.
Option 2: Make a glowing snowman jar with an LED light
Use a battery-operated LED tealight for the glowing version. Switch it on, lower it into the empty, dry jar and check that the face is visible through the white paint. Then fit the removable hat loosely, following the LED manufacturer’s instructions about placement and covering.
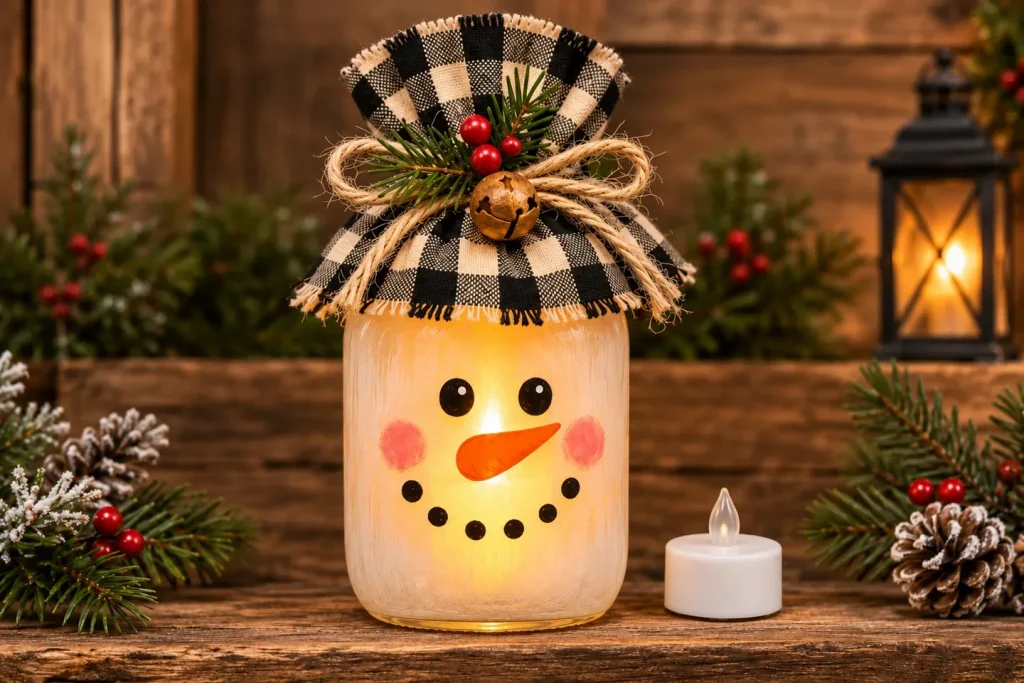
A warm white LED creates the glow without an open flame.
Do not put a real candle or any open flame in this jar. The fabric, twine and greenery are combustible. Use an LED with an enclosed battery compartment, and keep spare or loose batteries out of children’s reach.
If the glow is too faint, check the LED and its battery first. If the paint is blocking the light, use a thinner coat on your next jar. Do not scrape a finished painted glass jar to create translucent patches.
Common problems and how to fix them
- The paint looks streaky: Let the layer dry, then add a light second coat with a soft brush. Slight brush texture suits the rustic style; thick wet paint usually makes ridges worse.
- The paint scratches easily: Give it the full curing time stated on the label and handle it gently. For another jar, choose a paint specifically compatible with glass.
- The lid band will not turn: Check for glue, folded fabric or paint on the threads. Keep the hat removable and never force the band onto the glass.
- The hat hides the eyes: Trim the lower brim gradually or tie the crown slightly higher. Test before cutting more.
- The greenery makes the hat lean: Shorten the pick, use less decoration or move it closer to the knot.
- The candy does not fit: Use a taller jar, shorter wrapped candy canes or display the hat separately.
Styling, cleaning and storing your snowman jars
Pair red-and-cream plaid with black-and-cream plaid for the look in the illustrations. Keeping both faces similar helps the jars look like a set, while the different hats make each one distinct.
Display the jars indoors on a stable shelf, mantel or table, away from heat sources and the edge. Keep fabric and twine away from nearby candles, fireplaces and heaters.
Remove the hat before cleaning. Dust it with a soft brush and wipe the jar’s exterior gently with a dry or barely damp cloth, depending on your paint’s care instructions. Avoid soaking or putting the decorated jar in a dishwasher unless every material used is explicitly suitable.
For storage, empty the candy jar, remove the LED batteries according to its instructions, and cushion the glass. Store the hats without flattening the gathered tops.
Mason jar snowman FAQ
What size mason jar should I use?
Use a jar with enough smooth space for the face and an opening that fits your chosen LED or wrapped candy. A pint-size jar is a useful starting point, but measure the band and test your filling before decorating.
Do I need to use the flat part of the lid?
No. This design uses the metal screw band as the hat base. Set the flat disc aside and attach fabric around the outside of the open band.
Can I use regular acrylic paint on glass?
Some craft acrylics can work for gently handled decorations, but adhesion and curing vary. Check the label for glass compatibility and follow the manufacturer’s surface preparation instructions.
Can I use a real tealight candle?
No. Use a battery-operated LED light only. Keep open flames away from the fabric hat, twine and faux greenery.
Can the candy touch the painted jar?
Use individually wrapped candy and keep the paint, glue and decorations outside the jar. Do not treat a decorative craft finish as food-safe unless the product is specifically approved for that use.
Can I make this project with children?
Children can help plan the face or paint with age-appropriate materials under supervision. An adult should handle hot glue, sharp scissors, glass inspection and battery installation. Avoid small detachable decorations for young children.
Can I leave the finished snowman outdoors?
This tutorial is intended for indoor decoration. Ordinary craft paint, fabric, twine and indoor LED lights should not be assumed weatherproof.
How do I make the hat without a fixed pattern?
Measure your own screw band and make a paper mock-up first. Allow an overlap at the back, a short lower brim and enough height to gather the top. Adjust that mock-up before cutting fabric.